Sometimes you find yourself in need of some extra light on your image for some extra depth of detail, but going back to Maya can be a real pain in the ass. If you have a position pass and a normal pass of your render, it can really speed up your workflow. I defiantly advise you to make these renders from the world coordinates and not from those of the camera. If your images are renderd with a local Normal pass and a local Position pass, the lights in Nuke’s 3D space won’t always match because of the difference in coordinates. If you do everything in world space, they visually all add up.
- Download example files
Normal
Creating a normal map in Maya is almost too easy. Render Settings -> Passes -> Create Render Passes -> Object Normal (World space) and hit Create and Close. Then approve the passes by selecting it and hitting the green button to put your new pass in the Associated Passes.
Position Pass
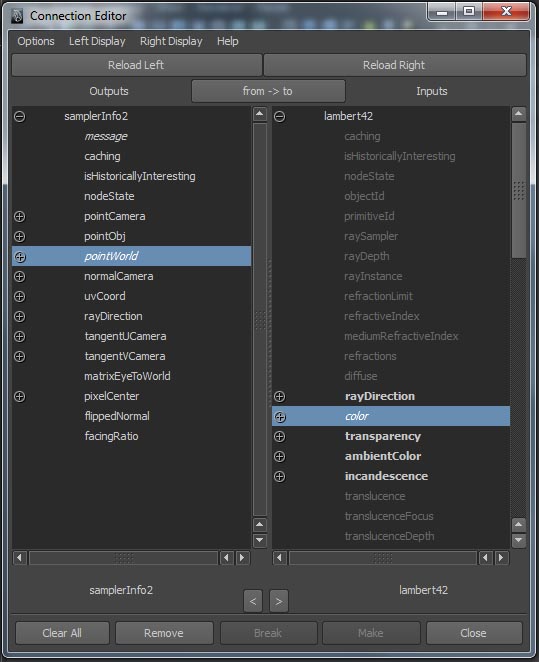
To make a Position Pass, you probably need a new render layer. I like to start with a new Lambert Material for this one and set the Ambient Color to full white, I know a Surface Shader can also be used, but I prefer the Lambert. Create a sampler Info Node and connect the Point World to the color of the Lambert, and that’s it. A position pass is an image that tells you where the points where in 3D space. It’s not exactly like this, but you can sort of see it as that the RGB value’s are the XYZ coordinates. Therefore, this image has to be a floating point image, like the 32 bit images. All done and hit render.
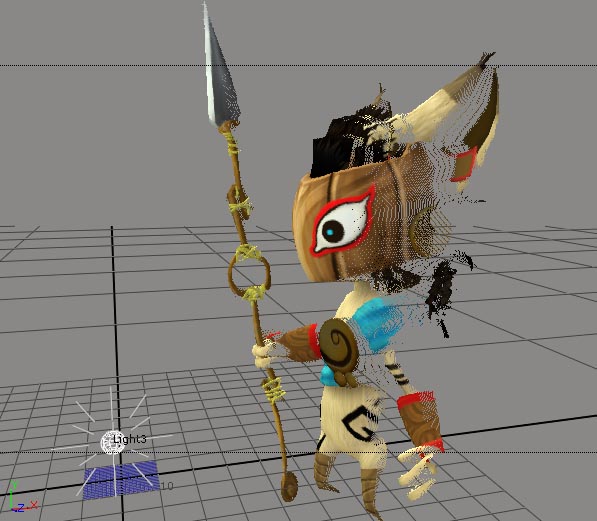
3D that image
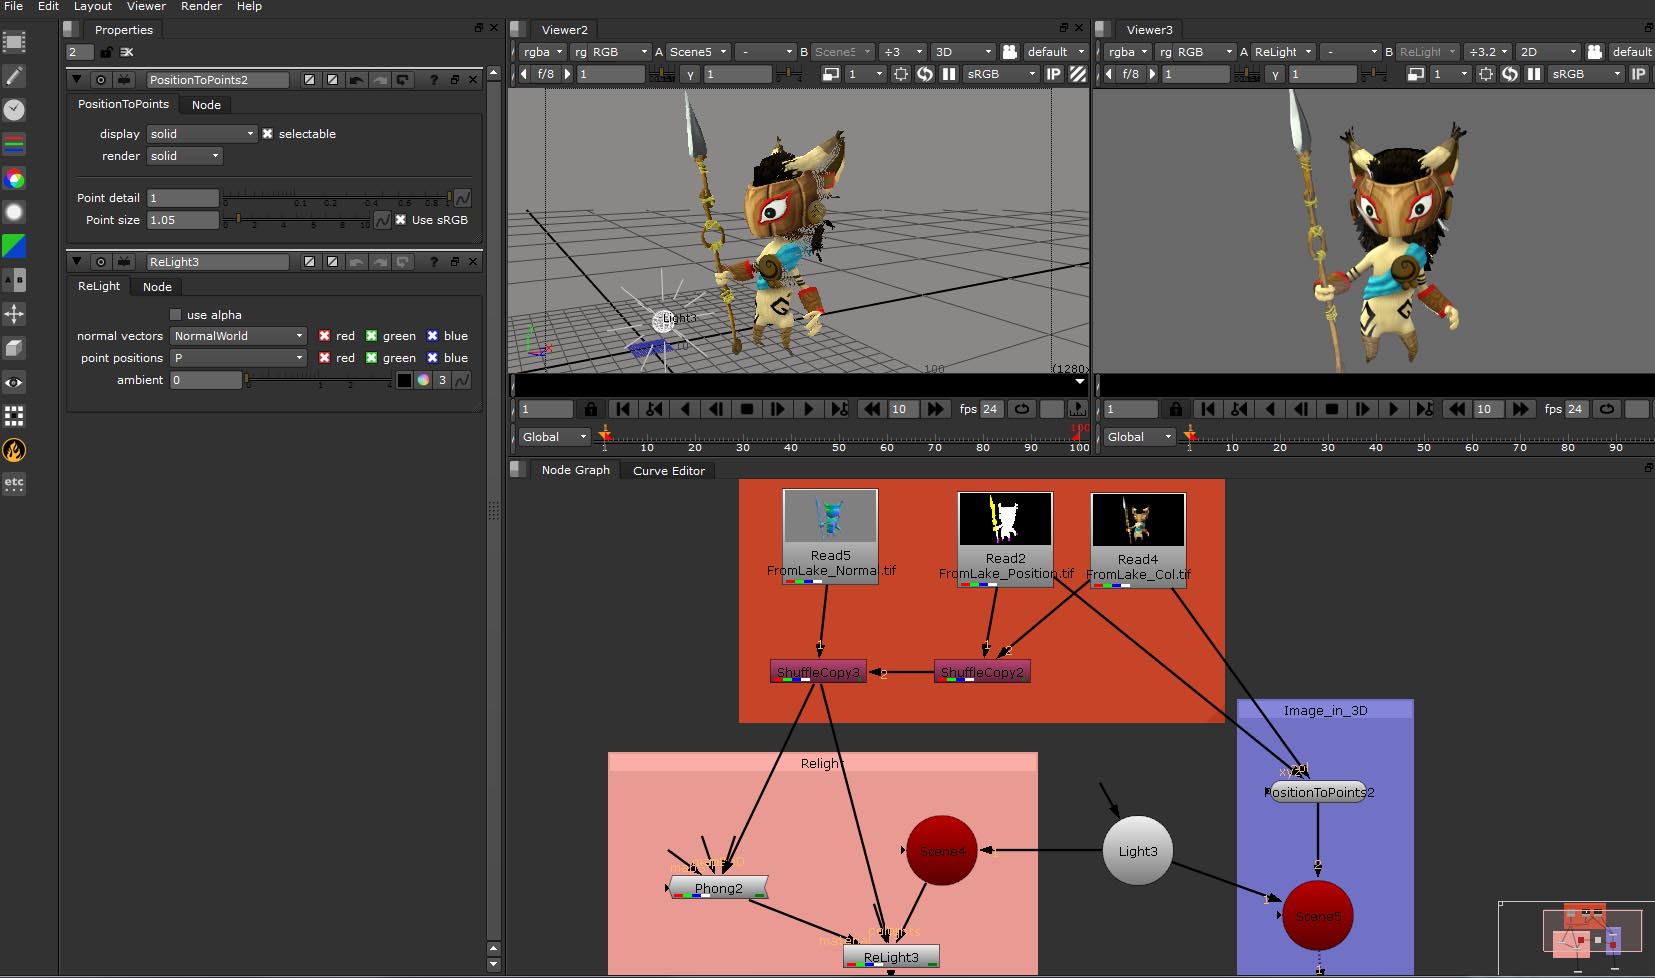
Relight with a Normal Pass
For this you’ll use the Relight Node, but for this little bugger to work you’ll need to put your color, Position and Normal Pass in one Node/Image/EXR with the help of the SuffleCopy nodes. If you don’t know how to do that, just check the file that you can download. To get the ReLight Node, update your plugins under the Other option just has before, if you haven’t done that already. I’m not saying the ReLight Node has bugs, but it’s not perfect either. Here it is. Connect the Color from your ReLight Node to the Node with all your image data and set the normal vectors to the Normal layer of your image, and the point position to your position pass. So far so good. Create another Scene Node and connect that scene to the already existing Light. Then connect the Lights from your ReLight Node to that Scene Node. For this thing to really work, you also need a material, like a Phong. So, create a Phong (just hit TAB and type Phong). But here to attach it??? Here comes the thing I was talking about. Connect the Phong to the ReLight Node, and you’ll see that the connection says, Camera. I don’t want a camera cause I want my image to be exact of how it was. What I like to do, CTRL click on the connection to create Dot. Break the connection between the Phong and the Dot, and connect the Phong again to your ReLight Node, now the connection says Material. You can delete the Dot if you like. If you want your phong to have the same colors as your image, connect the arrow with no description to your image, and you are set.
The reason for the PositionToPoints Node is that by having my image in 3D, I can visually set my light exactly as I want it in 3D space for my relighting. I can do this, because I connected the same light to both Nodes. And they are all true, because they are all in the same 3D space, world.
thanks for this mate, it is a very confusing little node :-)
ReplyDelete