I needed a RGB shader for a project with only two colors, for left and right, or top and down, front and back. The catch is, it had to be world orientated. If my character was dancing, if my camera was hysterical and jumped from one place to another, the blue color for the right had to stay right of the world coordinates. See it as a light in my scene shining on my object, but without the light.
This shading worked perfect for the scene it was needed for. When you make it, you probably have switch the settings for the front a back shading with the left and right. Another thing is, the shading is very heavy in the viewport, but it renders extremely fast in your render. So a good tip is not to show shading and texturing in your viewport while working with this shading.
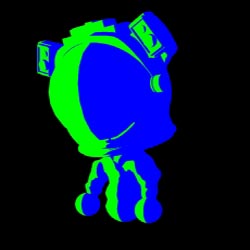
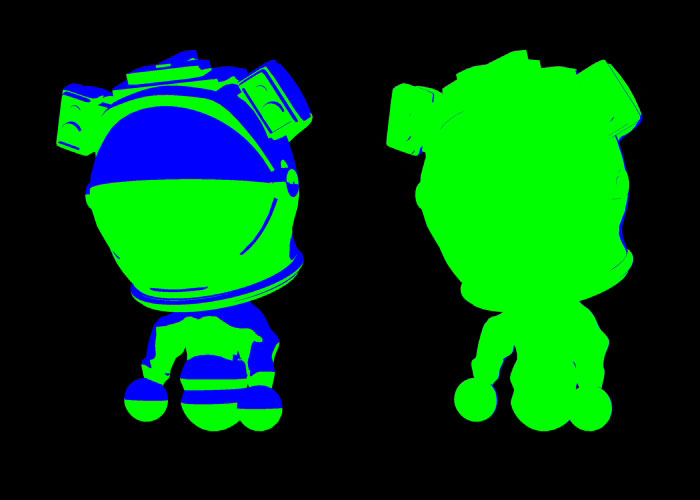
This is my model:
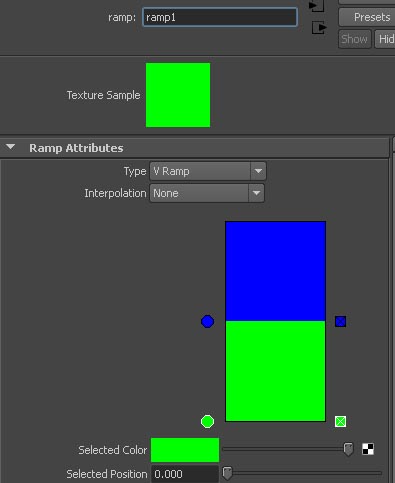
Create a Surface Shader and apply it to your model as a shader. Then create a Ramp and connect the Ramp’s outcolor to the outcolor of the Surface Shader. Set the settings of the Ramp to those as in the image below.
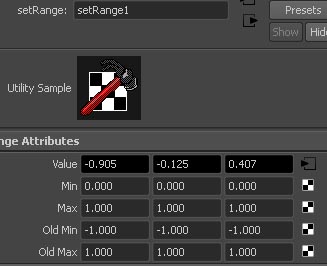
Create a setRange node, a VectorProduct Node, a SamplerInfo Node and get the node of your camera in the hypergraph as well (go to the cameras tab at the top and find that thing) Connect the Cameras Matrix to the Matrix of the VectorProduct. Connect the NormalCamera of the SamplerInfo Node to Input1 of the VectorProduct Node and set the drop down of the VectorProduct Node to Vector Matrix Product. Then connect the Output of the VectorProduct to the Value of the setRange. Set the Min in the setRange node to 0 for all three, the Max to 1, Old Min to -1 and Old Max tot 1.
And final, connect the OutValueZ from the setRange to the vCoord of the Ramp.
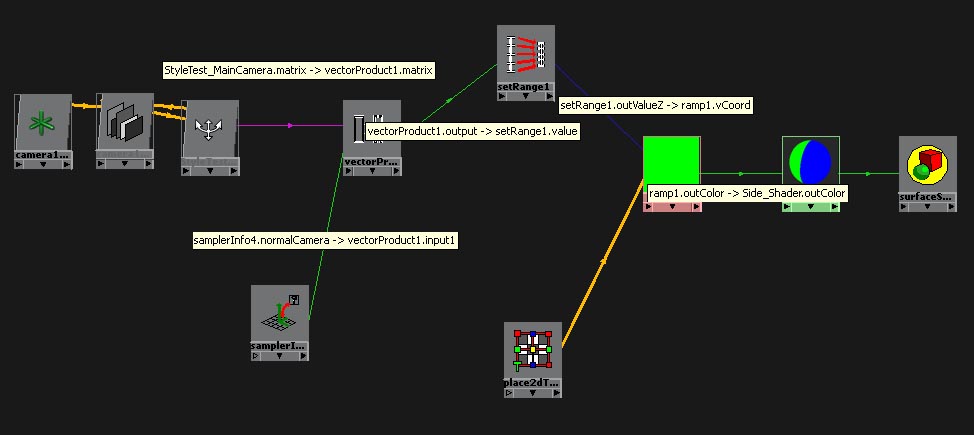
If you want a shader for the back and front, top and under, just change the way you connect the SetRange to the Ramp, for instance make it OutValueY instead of OutValueZ.
Diagonal
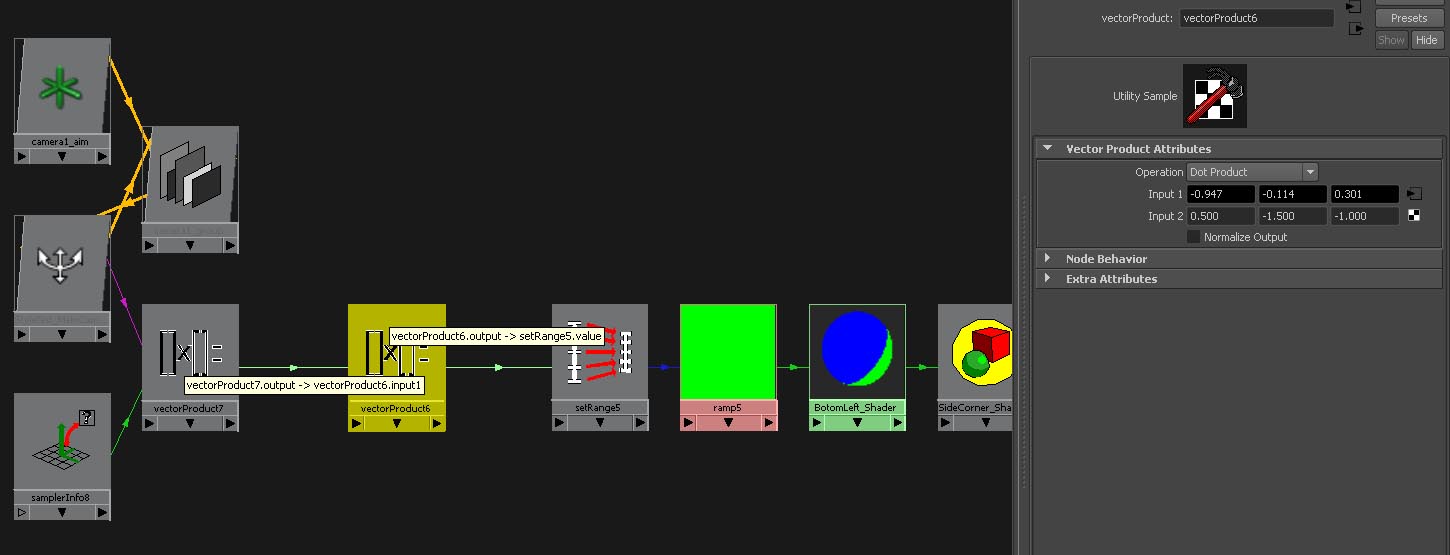
Lets make it difficult. Now I want this shading to be diagonal. Create an extra VectorProduct Node and place it between the other VectorProduct Node and the setRange Node. Set the new VectorProduct to Dot product and play with the numbers of the Input 2.

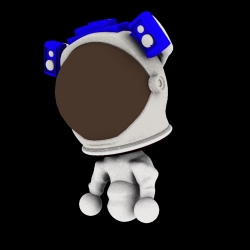
Result:
No comments:
Post a Comment