Intro
What does 32 bit linear mean, what is it and how do I use it? When I searched for “32 bit linear workflow”, I had a hard time to find all the answers or to understand what several tutorials tried to explain. In the end I found most of my answers in the tutorials from Zeth willie and a Dutch book called “Basisboek, Digitale fotografie & beeldbewerking” (the basics, Digital photography & image manipulation) from Frans Barten. I will post a link to Zeth Willie blog below this text and I can definitely recommend for you to watch his tutorial about linear workflow as well! 32 bit linear workflow is not as much as a hard subject, but it is difficult to explain because you don’t know where to start. I‘ve run through this subject on a seminar that I did some time ago called “It all end with Nuke, linear workflow in Maya and compositing in Nuke” to second year students, and it went extremely well. So let’s start from the top.
8 bit images
Lets start with what you usually have. A jpeg file, a tiff file, a png file, ect. These are all 8 bit images. Now, what does that mean? Lets jump back a little bit more, to photography. Humans can only see about a couple of hundred magnitudes of each color. That means, a few hundred magnitudes of red, a few hundred magnitudes of blue, and so on. The more colors/data a image has, the bigger its data size is. One bit (a computers does everything in bits) has two options, on or off, an 8 bit image has 256 (2⁸) options/colors for each channel. That’s perfect, because it’s just a little bit over of what we can see. So the normal 8 bit image you use, if probably a 3*8 bit image. 8 bits (256 colors) for the red channel, 8 bits for the green channel and 8 bits for the blue channel. RGB, Red, Green, Blue. Three channels, therefore the term, 3*8 bit image. When you also have an alpha channel in your image, you talk about a 4*8 bit image. So an 8 bit image is perfect for a final image, it has only the data that we can see as being a human, so the data size is pretty small. The values in a 8 bit image is between white, 0. and 255 (can also be displayed as 1), black.
32 bit images
What if we want to color grade an 8 bit image? If you change the exposure on your image, or the contrast, the brightness or whatever, you push and stretch the values of your colors. By example; place a line of marbles on your table (or on the floor, whatever works for you), and you can only see the marble that’s on every 2nd inch. If you bend and stretch the space between those marbles, you get big gaps between the marbles. If you now grab every marble that lies on every 2nd inch, you have a problem, because there is not always a marble on the 2nd inch. Now you have a poor quality image. 32 bit images doesn’t have that fixed values between 0 and 255, but they are floating points, meaning that that they can have any value for each channel on each pixel, infinite. When you color grade a 32 bit image. You don’t change fixed levels like in a 8 bit a channel image, but you are changing infinite values. It is the best representation of the real world. Not all file formats can support 32 bit linear float. Files that do support can be uncompressed TIFF, EXR or HDRI.
RGB and sRGB
Monitors causes your image to be displayed much darker then they really are, this is called gamma. Monitors lower the gamma of your image by 0,455, this makes your images much darker. In Photoshop, you can play/find the gamma in the levels menu with the option in the middle of your histogram. The problem with this monitor thing is, we may see a mid-grey, color value of 127, but it’s not what it is. Photoshop deals with most of this gamma problem behind closed doors and by that you can’t get a really clear grip in this, “What I see is not what I have”. Later in this example I’ll use Nuke because of this. To contradict the effect of darkening the image, most images have a gamma of 2,2 to even it up and get a linear looking effect on your monitor, but it’s actually not. It’s a very lightened looking image displayed on a monitor who darkens it, and we meet in the middle. We get an image that looks true.
This effect of a gamma of 0.455 in your monitor is called sRGB, the gamma of 2.2 on a 8 bit image is pretty standard and can be found in images like Jpeg, Png, Tiff, ect. Usings a gamma of 1 (so you will see a darkened image on your monitor) is mostly used in 32bit linear float images like Uncompressed Tiff, EXR and HDRI images. It is also what we would like to have in compositing and color correction. We want this because color correction is nothing more than math with the values in your image. If we see a mid-grey of 127, it should calculate with the number 127 to get the math right, we don’t want the software to calculate with a completely different number then we see. These images, are linear, because the gamma on then image = 1.
This is what technicallyhappens;
Gamma of 1
Gamma of 0.455
Gamma of 2.2
32 bit linear workflow in Maya
Maya is a linear program, and that’s good. This prevents a lot of issues if we look at math again, but it also asks us to be aware of how we use the images that we throw in as textures, and that we render out. The image that I render in Maya, like in this image below, is done in linear space and so this image is linear. But it is displayed on a monitor who uses a gamma of 0.455 to darken your image. Another thing to look out for, the textures that we use probably have a gamma of 2.2 and that’s why the images look correct in the render. We can deal with this in different ways and I shall explain of few of them.
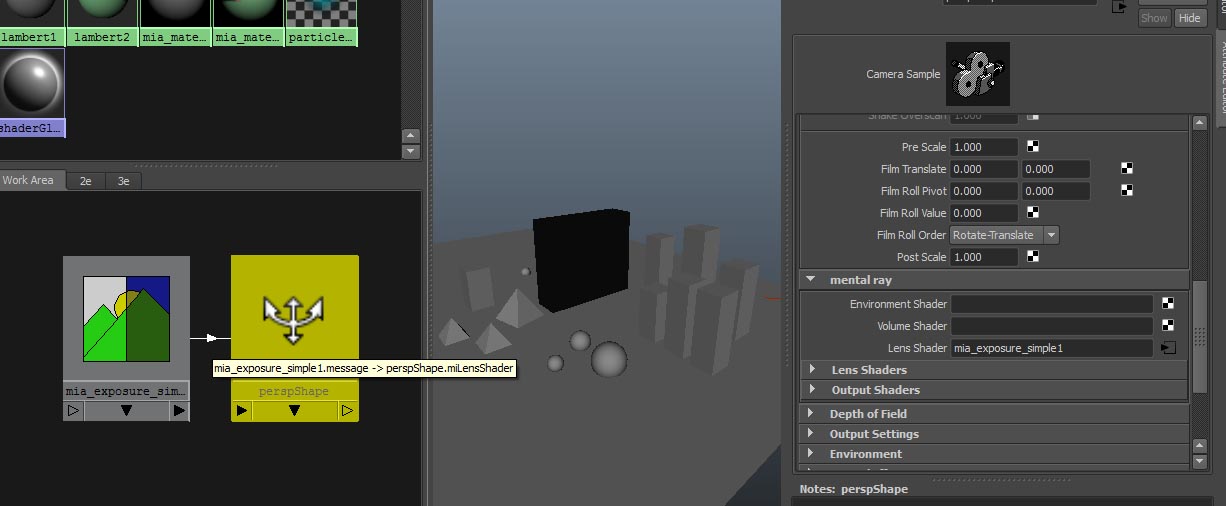
Maya 2011 is blessed with a menu in the render view in which we can see, deal with this gamma problem of the monitor. Go to display -> Color Management, and switch the Image Color Profile to Linear. No you see a much render image like the second image up, in fact, now you see the image as it should be. We could also place a mia_exposure_simple (found in the Lenses section of the Mental ray nodes in your hypergraph) node to the Lens Shader input in the Mental Ray section of your camera from which you render. If you look at the Exposure Node, you’ll see a gamma input with a value of 2,2. (Don’t forget to turn the color management back to sRGB to see the correct result)
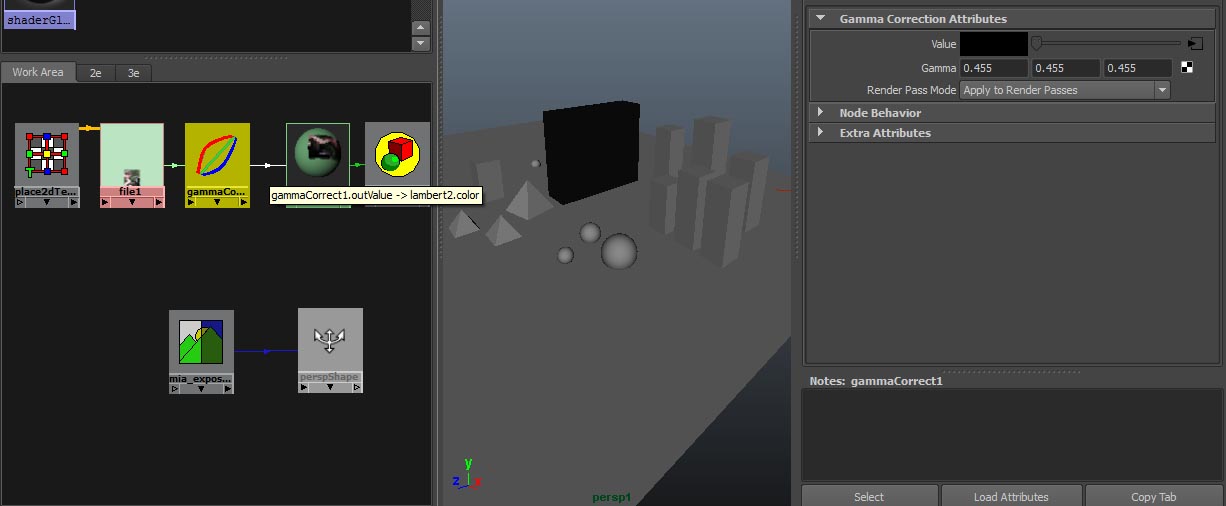
What about the texture? The texture has a gamma of 2.2. In order to fight against this, we can connect the image in a gamma Correct Node (you can find this node in the Utilities section of the Maya nodes in your hypergraph) that we set to a value of 0.455 for all three inputs. The we connect the Correct Node to the input in the shader to which we want to connect the image to. With the Color Correct node, we de-gamma’d the image from a gamma 2.2 with 0.455, to get a linear image. No we have a linear image in linear space. You can see the result in the third image up. If you did it correct, your texture now, looks the same (apart from the lighting) as it did in the render before the gamma correction of the render.
Now, you could also use textures with a gamma of 1, like a uncompressed Tiff. I don’t like this method because it gives me another place on which to make errors. But, there is another way in Maya to deal with the gamma. That is called Frame Buffer, found under the Quality tab of you Render Settings. Set the gamma to 0.455, and Maya automatically renders your image with a gamma of 2.22 and resets your images with a gamma of 0.455 to create linear images. This actually creates a better looking image, that will probably be noticeable when you zoom into your image by 100 times. The bad thing about this technique is, that Maya will also gamma correct your bump maps, specular maps, normal maps, ect. And that’s not something that I always want. So I have to gamma correct those images in advance with, for instance, a Gamma Correct node that’s set to 2.2. Be aware, if you use a Physical sun and Sky, Maya automatically creates a exposure node to your camera. If you don’t want to gamma your image, of have this extra gamma on top of you frame buffer or color management, just set the gamma on this node to 1.
If we want to render out our images, we have to make a decision. Do we want to create linear images, of do we want to have sRGB images?
I want a 32 bit linear float image. To create a linear image, you need to set every gamma to 1, the frame buffer and/or your exposure nodes on your camera. To create a 32 bit image, we have to tell Maya to create a 32 bit image. Again, go to Framebuffer in the Quality tab of your Render Settings, and set the Data Type to RGBA (float) 4*32 bit. Go to the Common tab and select a Image format that supports 32 bit linear images, like TIFF uncompressed of EXR. Then render that shit out. (Batch Render that is, for 32 bit images, I would defiantly suggest to use the batch render)
I want a 8 bit image. Because it’s an 8 bit image, 256 color values, I want my image to have a gamma of 2.2 (also because people would expect this 8 bit image to be like this). go to Framebuffer in the Quality tab of your Render Settings, and set the gamma to 0.455. Or, if you use the exposure node on your camera, and set the gamma to 2.2. Set the Data Type in your frame buffer to RGBA (Byte) 4*8Bit and select an Image format, I like iff.
Nuke
Most of the time, I use Nuke for compositing. I think it’s an awesome program, but it also deals with the whole gamma story in a pretty good way. If you’re not familiar with Nuke, don’t be alarmed, I’ll guide you with the basic needs. Nuke uses a node based system and not a layer based system, so if you’re not familiar with this, brace yourself.
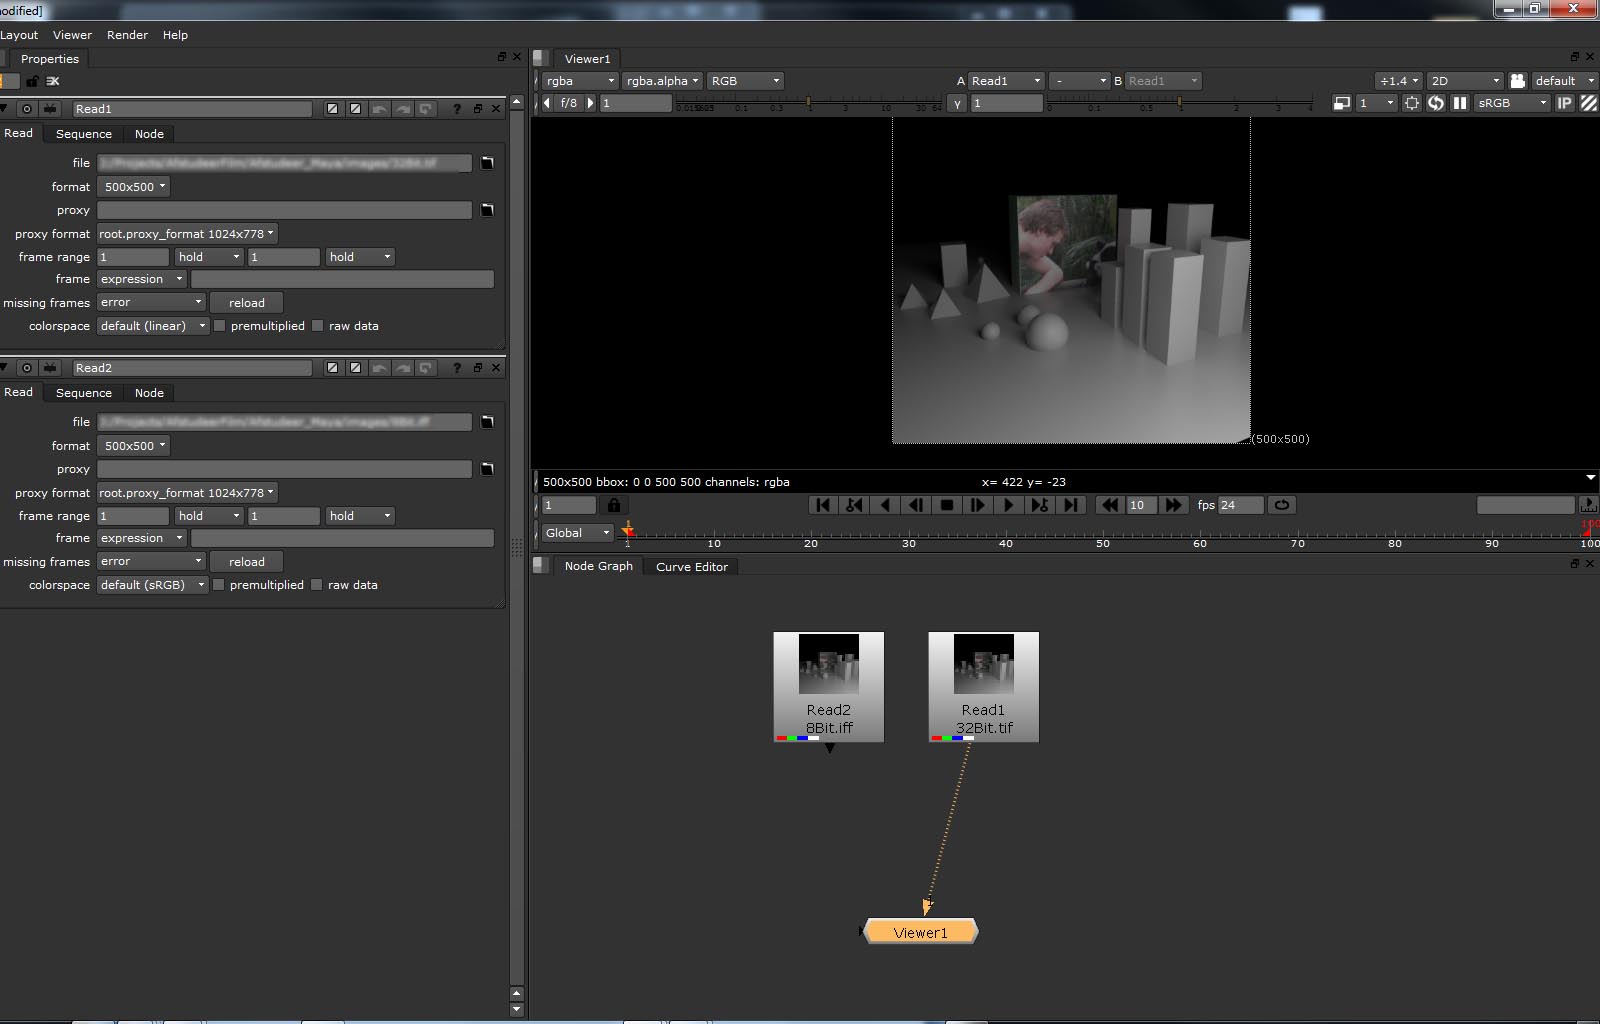
You can drag and drop your Gamma corrected image in the Node Graph, or you use the shortcut R (read) to create a Node to load your image. See the image below. To view the image, select and drag the arrow from the vieuwer1 node to your image. If you did it correct, the images should look pretty much the same in Nuke. That is because Nuke sets every image in to a linear space behind its curtains. This is again with the reason of right math. What we see, is what we have. To check this, hit you s key, and a properties window in being opened in the Properties Pane. Go to the LUT tab. Here you can see and change how Nuke will treat certain images in order to set them to a linear space. But wouldn’t the images be dark then? Yes they should, but we don’t want to color correct these images just yet, because we have to composite and color correct them. Just like the color Management in Maya, you can set the viewer to a sRGB space (which is default) by the dropdown menu at the top of the viewer.

Links:
- Zeth Willie, great tutorials and defiantly a blog to keep your eye on- A fantastic tutorial on linear lighting and rendering for interiors
No comments:
New comments are not allowed.